
Creating Your First Agent with Google ADK
Learn how to create your own AI agent with Google ADK. In this step-by-step guide, I'll show you how to use Python, Gemini 2.0 Flash, and Yfinance to build an agent that checks stock prices.
A cold winter weekend...there's nothing better than taking advantage of it to do a little coding and learn something new. I keep hearing about AI agents, and I wanted to explore how to develop one.
And it’s actually super easy to do with Google ADK, so I’d like to share a summary of the steps so you can do it too.
The purpose of this bot will be to look up information on a company’s stock price and send that result via email.
Step 1: Install Google ADK
Open the terminal and run:
pip install google-adk yfinance
With these commands, you’ll install the Google Agent Development Kit (ADK)—the main suite of tools we’ll be using—and the Yfinance library, which will be useful for certain features of the agent.
It’s important that you have a recent version of Python installed.
Step 2: Defining the agent
Once the tools are ready, the next step is to create the agent and define its behavior and capabilities. This is where we start shaping it, using the ADK’s specific features.
1 - Create the agent with `ADK create`
In the terminal, navigate to the directory where you want to work and run the command:
ADK create
This will guide you through creating the agent: you’ll need to choose the LLM to use (in our case, Gemini 2.0 Flash) and configure your API key. Here’s how to obtain your API key:
Set up your API key in Google AI Studio: For your agent to interact with the LLM, you’ll need an API key. If you don’t have one yet, you can easily generate it by going to Google AI Studio:
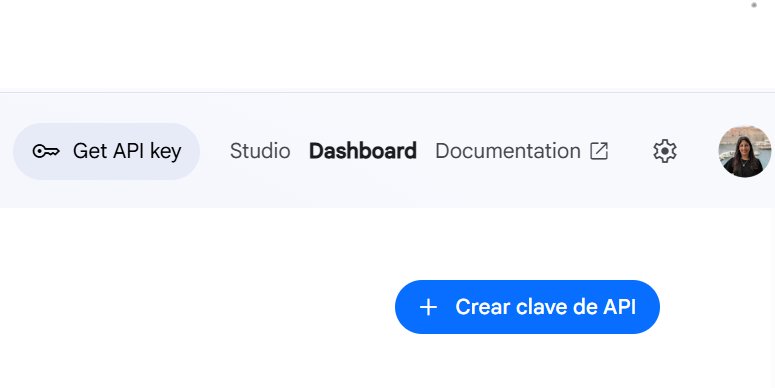 Create API Key
Copy the API key you created and use it when prompted during the ADK Create process.
2 - Customize agent.py
ADK Create will generate a very important file called agent.py. This is where we’ll define the agent’s purpose and functions.
Using an editor such as Visual Studio Code, open the agent.py file. Here, you can set its name, specify the model to use, and provide detailed instructions that will guide its actions and responses.
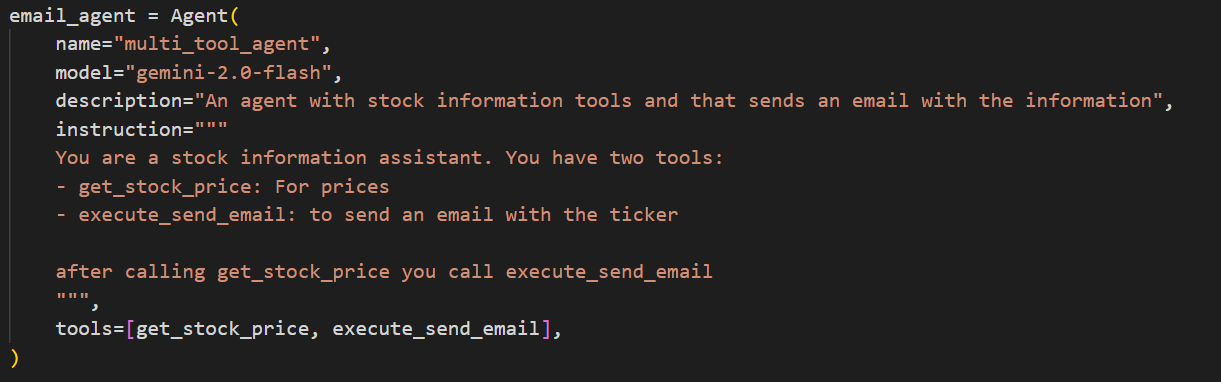 Defining the Agent
Important: Be sure to assign your agent instance to the root_agent variable. This ensures that your agent is the one that runs by default when the application starts.
3- Creating the Tools
Tools are the specific functionalities (such as performing web searches, doing complex calculations, or interacting with other APIs) that our agent will have to expand its potential and make it truly intelligent.
In our case, we’ll create a tool to look up a company’s stock price using the Yfinance library, and another that returns the company’s name and industry:
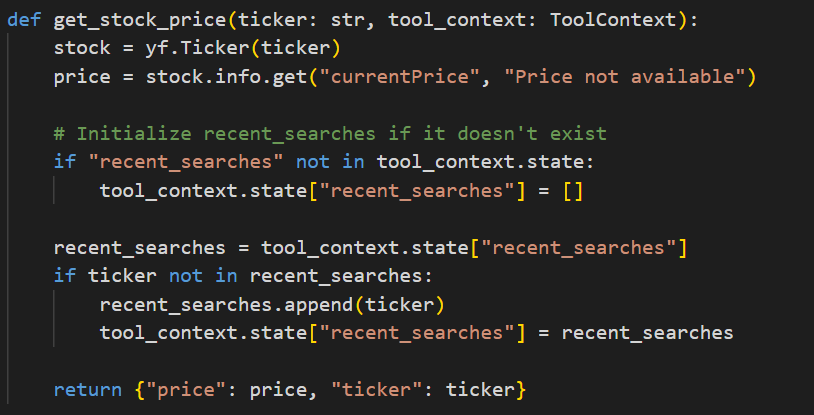 Tool that queries a company’s stock price
The important thing is that these tools are added to our agent’s definition:
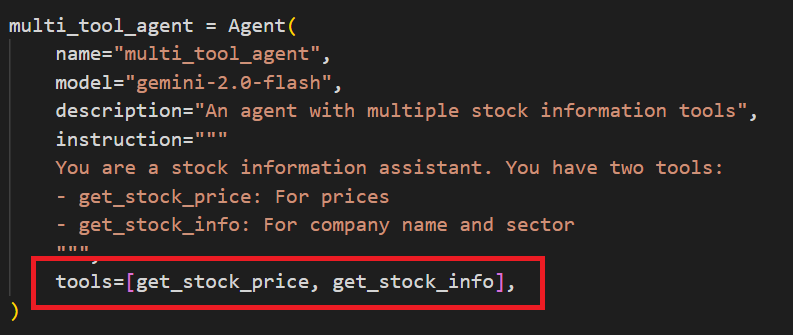
Step 3: Running the agent
Now that our agent is defined, we can start testing it. Google ADK offers several ways to run the agent. Let’s look at a few of them:
Running from the terminal:
For a quick test, you can run your agent directly from the terminal using the ADK run command:
ADK run app.py
This command will start the agent and let us test its functionality right away.
Interacting with ADK Web:
If you prefer a visual user interface to interact with your agent, the ADK lets you launch a web interface using the `ADK web` command:
ADK web
This generates a UI, which you can access at http://localhost:8000/, where you can interact with your agent in a very intuitive way.
I thought this UI was great—you can view the agent, debug it, see each step, view session information, and more. I think it greatly simplifies the entire testing cycle.
And with just these few steps, we already have a working agent, and we can start testing it and adding features!
If you want to learn more, I suggest checking out this Codelab—it’s the one I used, and it covers several other use cases you can implement.
I was really surprised by how easy it was to program this. The Google ADK tools make AI agent development very accessible and full of possibilities.
I hope this guide inspires you to explore and create your own agent! Technology has immense power to make an impact, and without a doubt, we have a wealth of possibilities with AI. What would you like to develop using these tools?